Building the 2018 HO Jubilee of Trees Layout - Part 1
Over the next few months, the construction of this year's project railroad will be documented here in a series of posts beginning with HO modeler Bruce Klawitter. In this post he explains the steps he took to
select the track plan, lay track, and install the ballast.
 Joe Zukowski and I made a few adjustments as we had to lay the turnouts onto
this center line in order to adjust the angle of the track exiting the
turnouts. From this center line, I took the 3' strips of Woodland Scenics black
roadbed and where the track ran straight, I used the whole piece gluing it into
place with construction adhesive. To
make sure it remained straight, I bumped up to the edge of it with a
straightedge and made adjustments while the glue was fresh. I pined this
in place with some T-pins. As you go into the curves, it is necessary
for you to take a scissors and cut the roadbed pieces in half on the pre-marked
line. The full piece won't bend. After putting the adhesive down
on one side of the center line, spreading it with a putty knife, I followed the
center line and placed the strip around the curve. I followed this
procedure until all of the roadbed was glued down. In the areas under the
turnouts, I just glued in scraps under them.”
Joe Zukowski and I made a few adjustments as we had to lay the turnouts onto
this center line in order to adjust the angle of the track exiting the
turnouts. From this center line, I took the 3' strips of Woodland Scenics black
roadbed and where the track ran straight, I used the whole piece gluing it into
place with construction adhesive. To
make sure it remained straight, I bumped up to the edge of it with a
straightedge and made adjustments while the glue was fresh. I pined this
in place with some T-pins. As you go into the curves, it is necessary
for you to take a scissors and cut the roadbed pieces in half on the pre-marked
line. The full piece won't bend. After putting the adhesive down
on one side of the center line, spreading it with a putty knife, I followed the
center line and placed the strip around the curve. I followed this
procedure until all of the roadbed was glued down. In the areas under the
turnouts, I just glued in scraps under them.”
“I placed the turnouts in their places after putting down some construction adhesive being careful not to get any under the moving parts and T-pinned them in place. I did not solder the flex track to the turnouts in case of a problem with one, it could be replaced easily. I put a thin layer of glue down under the track as I placed it around the center line left by the roadbed. I would T-pin this in place as I went. Around the curves, the inside rail always ended up uneven with the outside rail, so I would use a track clipping tool and then file off any rough edge. I would break off two or three Ties so that the area was clear for soldering. Slide on a pair of rail joiners, and then slide on another length of track and solder them together. This part has to be done quickly while the construction adhesive is still wet. Keep going around the layout until all the track is in place and let the glue set up.”


“After selecting a layout from
one of the magazines, I drew it onto the 2" hard Styrofoam sub-roadbed.
“I placed the turnouts in their places after putting down some construction adhesive being careful not to get any under the moving parts and T-pinned them in place. I did not solder the flex track to the turnouts in case of a problem with one, it could be replaced easily. I put a thin layer of glue down under the track as I placed it around the center line left by the roadbed. I would T-pin this in place as I went. Around the curves, the inside rail always ended up uneven with the outside rail, so I would use a track clipping tool and then file off any rough edge. I would break off two or three Ties so that the area was clear for soldering. Slide on a pair of rail joiners, and then slide on another length of track and solder them together. This part has to be done quickly while the construction adhesive is still wet. Keep going around the layout until all the track is in place and let the glue set up.”
“We used manual throws on
this, and those were put in place next to make sure the turnouts were all
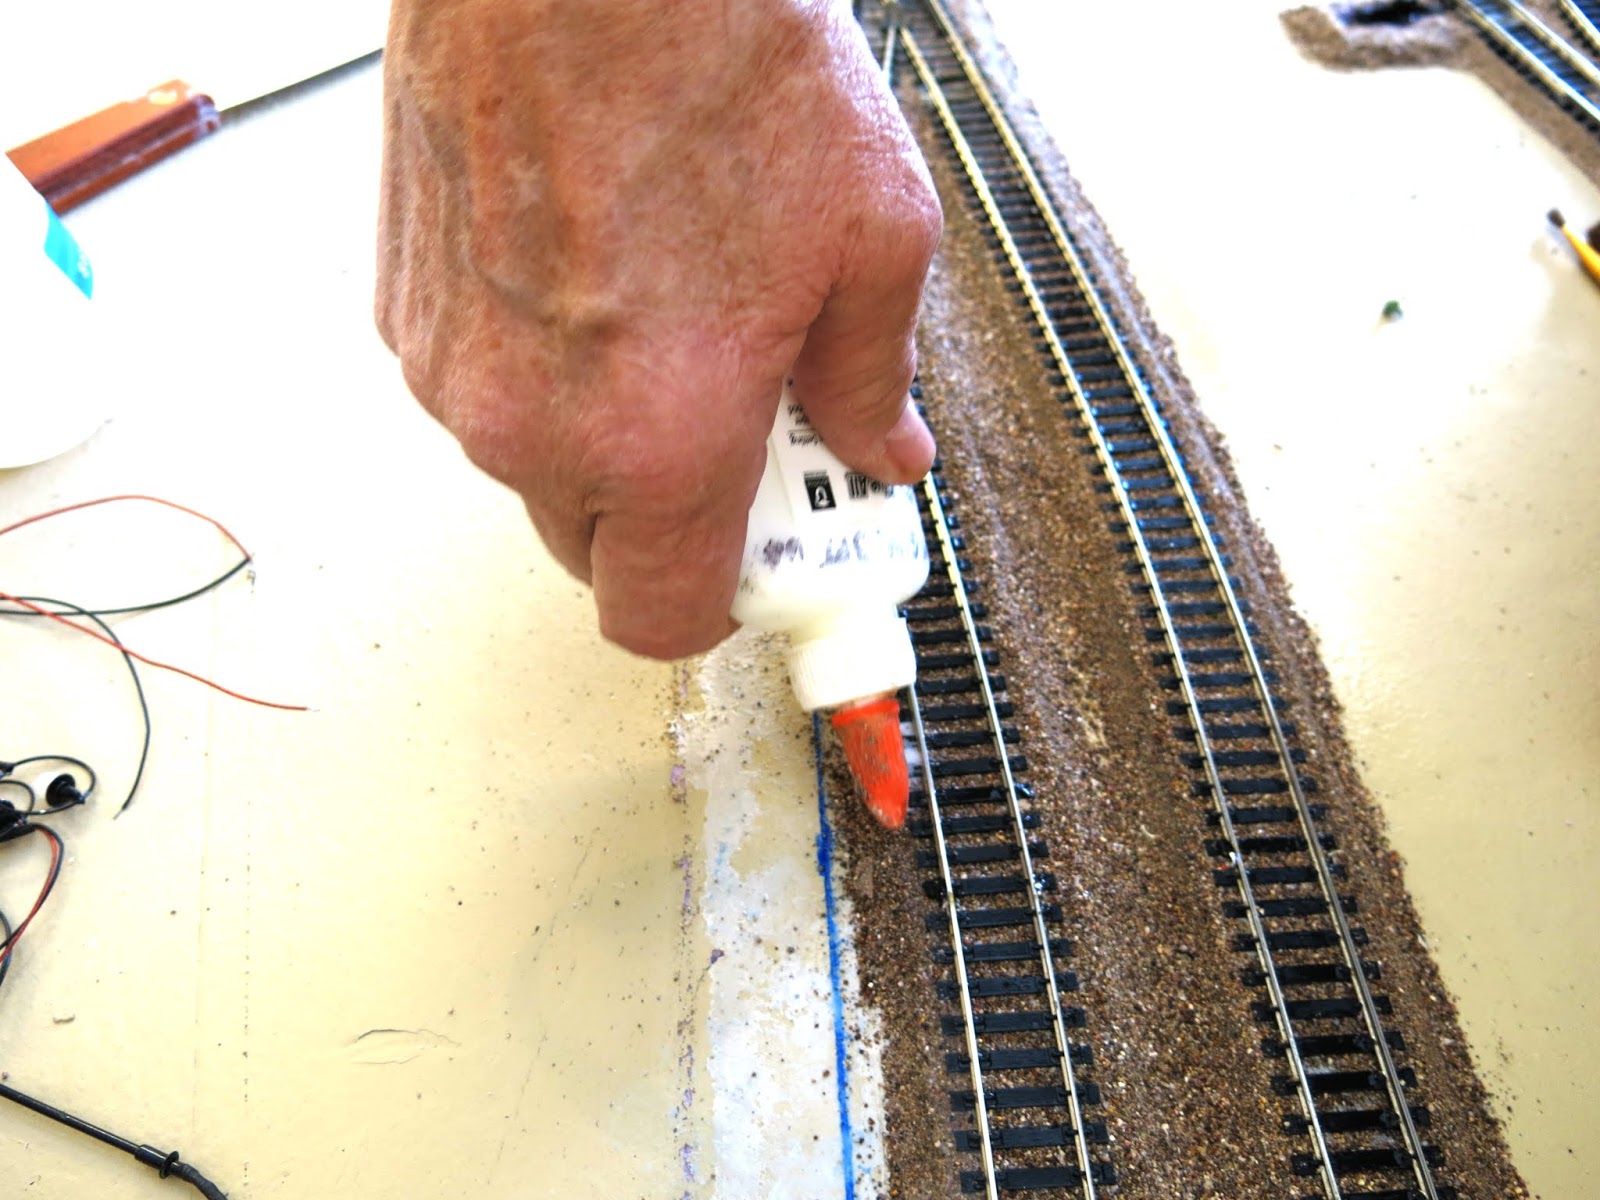
working properly. Next comes the ballasting. The way I do it is I
use straight white glue and squirt a bead of it around the edge of the roadbed
so that I covers from the Styrofoam bed up to approximately the height of the
top of the ties. I use a 1/2" wide brush to make a nice smooth
edge without any of the glue flowing into the area of the ties. I then
take a small plastic spoon and sprinkle ballast on this white glue, gently
patting it in place seating it into the glue some. Excess can be pushed
around with a putty knife. Let this dry. It becomes like a
"dam" when you go to ballast around the ties and keeps the diluted
glue from traveling outside the track. Ballasting the middle of the track
is the hardest part. You have to get a feel for how much material to
sprinkle on the ties and then I use a brush and my finger to push it into all
of the recesses in between the track and on the outside edges. Once you
have the dry material in place, I spray a light mist of Isopropyl alcohol over
the dry ballast (it helps the glue penetrate) and then I dribble diluted
white glue with a couple of drops of dish soap, onto the Ballast. You
have to make sure everything gets some of the glue solution on it without
having it run out all over. Absorb this extra with paper towels if
necessary. Ballasting under the turnouts is tricky and you have to make
sure the thing works after the glue is set. Any extra ballast that is on
top of the ties after the glue sets can be scraped off with a razor knife.
The top of the railhead will have to be cleaned off if you got any glue on that
surface.”
“The 4' x 8' layout we are
building took me about 50 hours to get to this point with lots of help from Joe.
Once this was all in place and vacuumed, we put in the electrical drops and
soldered them to the track and filled in the ties that were pulled off where we
did the solder joints and ballasted them in as well.”
Stay tuned for additional posts on the construction of this year's Jubilee of Trees model railroad.
Stay tuned for additional posts on the construction of this year's Jubilee of Trees model railroad.